|
Aetiket Label Printer Custom Graphics
|
|
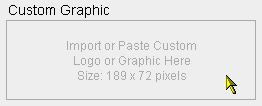
Aetiket Label Printer enables you to store logos or custom graphic designs with your labels. The custom graphic can then be printed at the same time as the text, and is easily accomplished by selecting the "Use Custom Graphic" box on the setup page. Each different label type can store one custom graphic. Installing Custom Graphics
Once you have pasted a custom graphic into the "Custom Graphics" field, it is available to you each time you print that label type. Alternately turn the graphic printing on and off by simply checking the "Use Custom Graphic" box on the setup page. Known Issues The size of the "Custom Graphic" field in preferences is fixed, even though the labels come in many different sizes. In the Data Input pages however, the graphic is shown in the right size and shape for the label. The graphics have been designed to be centered in the field space, and are automatically reduced to fit if too large for the field. The best way to have complete control over the placement of a graphic is to use or create a graphic exactly the same size as the label field. The size of the field is shown in light gray in the Custom Graphic field when there is no graphic installed. |
|
Page last updated May 15, 1998 Copyright © 1997-1998 by Eric Fandrich All Rights Reserved. |
