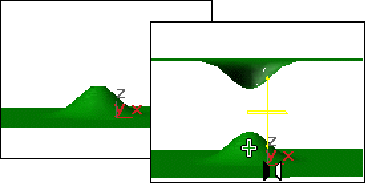


A mirror surface is a mirror-image of the original surface.

Surface created as a mirror (about the Z axis)
When you turn on the Mirror button, or while a mirror surface sub-object is selected, a rollout with the mirror parameters appears. Also, a gizmo (yellow by default) indicates the mirror axis.
The Mirror Axis buttons control the direction in which the original surface is mirrored. The Offset controls the mirror’s distance from the original surface. This parameter is animatable.
You can't transform the mirror surface directly (this simply transforms the mirror surface and its parent surface at the same time). You transform it by transforming its gizmo.By using transforms you can mirror about an arbitrary axis, rather than one of the Mirror Axis presets. When you transform a mirror surface, you are actually transforming the mirror plane, so Rotate has the effect of rotating the plane about which the surface is mirrored. (This is like rotating the mirror gizmo in the Mirror modifier.)
Tip: A convenient way to guarantee that a surface is symmetrical is to create one side of the surface, mirror that surface, and then create a blend between the two sides.
3DS MAX creates the mirror surface. A black gizmo indicates the direction of mirroringtransforming the mirror surface’s gizmo changes the orientation of the mirror, letting you mirror along an axis that isn’t aligned with a local coordinate axis.