
Time Machine Quick Tutorial
To have a look at what can be done with Time Machine, let`s run through the making of the cheesy Web banner above.
First, we need to plan ahead. TM is a glorified batch processor, so you need to work out what files you need for your finished project, and which order to put them together. In the above example there are four layers: the flame background, the gyroscope animation, and two layers of text.
So...
Start TM by pressing the Arexx button on the main IFX toolbar, and running the start_TM.ifx script in the time machine directory.

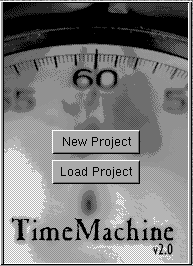
You will see this "splash" screen, where you can load an old project, or, in our case start a new one.
The first thing you will be prompted for is the format of your background layer.

You have the choice of a blank buffer, still image, sequence of files, FlyerClip or JStream. (The ANIM option is not possible on the background because it is a CMAP format.)
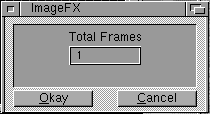
Next, you are asked for the total number of frames in the finished project, so if you are processing a stream of images you will need to have made a note of this before you start.

Our background layer is going to be the animated fire, which will be generated when we render the final project, so for the moment we`ll settle for BlackFrame, and enter the project dimensions in the create buffer prompt. Once we have a background layer selected TM will load the file in question, and then go into its normal operating mode. The TM toolbar looks like this:

As you can see the only options are to load a new layer, start the rendering process or quit. So let`s load a new layer. The next layer in our example is the gyroscope. I have rendered these frames in Real3D using an alpha channel, and saved the result as targa files. So each image has both a colour,

and an alpha component.

IFX can detect this alpha channel, so when we load this sequence the background is automatically masked out. When you load a sequence or stream of images you have the option of which number frame to start at, and with JStream or FlyerClips whether to load one image repeatedly (freezeframe).
So, now we have a black background, and our animation on top, but as you can see if you compare the image of the gyroscope with the finished banner, the animation frames are larger than the finished project. This is one advantage of TM - you`re using the IFX layer stack which can take images of any size and move them around, rather than the old Main/Swap composite method. So, to move the gyroscope to where we want it just use the "Move layer" option from the standard IFX layers palette and put the image in place. TM doesn`t keep track of these sort of changes, it has to be told, so when we`re happy with the layer placement highlight the TM toolbar, and right mouse click to see the TM menu items. The "Layer" menu is used to snapshot the various layer properties when they have been altered from default. So try and remember, if you alter the layer position, blend or mode make sure you "snapshot" the changes, or they won`t be used in the final render!
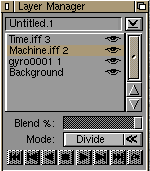
The final two layers are straightforward: create small files with the words "time" and "machine" on the alpha channel, and load them via the TM toolbar. Again, you can move the position of the layers until you`re satisfied, then "snapshot" the changes. In this instance I`ve also changed the mode of the layer with the word "machine" to Divide, so that there`s some of the movement from the fire in the background showing in the letters. The final stack of layers looks like this:


But where`s the fire? As I mentioned earlier this will be generated during the final render, but to do that we have to use an external Arexx script. Highlight the background layer in the Layer Manager, then go to the TM menus. The process menu has items for applying a script to a layer, or to the final flattened output files. Here we want to apply the script to the background only, so choose "Layer Script". You can use any script that you have written or recorded, but in this case use "TM_Fire.ifx" supplied with TM to demonstrate the generation of "EOT" style animation. The IFX hooks such as clouds, fire and bubble work by changing as a function of their increment, or frame number, and the supplied TM scripts just supply that frame number into a settings file that you have saved earlier. Bear in mind that nothing you do to the images on screen when preparing a TM project will affect the final render, so you can play around with almost any effect until it looks right (keep undo-ing!), then record a script for a layer. We need a settings file for our fire effect, however, so select the background and fire up that effect. Alter the fire settings until a test or preview looks good, then save the settings. When the project is rendered you will be prompted on the first frame for which settings file to use, then TM does the rest.
All that remains now is to double-check everything, then hit the render button on the TM toolbar. You can choose which file format to save the final project in, and you will be prompted for any options relevant to the format. If you are rendering an ANIM file you will be asked if the render settings are correct. Don`t worry if they`re not, just cancel the requester, set the render options how you want them and press render again.
For those interested in getting under the hood of TM please have a look at the Arexx Hints page.