5. Starting Privoxy
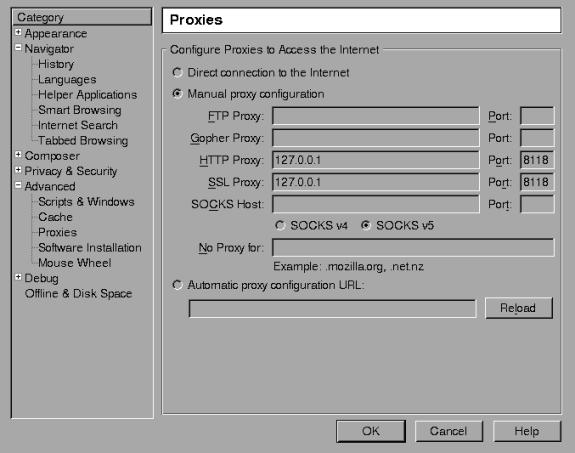
With Netscape (and Mozilla), this can be set under:
Edit
|_
Preferences
|_
Advanced
|_
Proxies
|_
HTTP Proxy
For Internet Explorer:
Tools
|_
Internet Properties
|_
Connections
|_
LAN Settings
Then, check "Use Proxy" and fill in the appropriate info (Address: 127.0.0.1, Port: 8118). Include HTTPS (SSL), if you want HTTPS proxy support too.
After doing this, flush your browser's disk and memory caches to force a re-reading of all pages and to get rid of any ads that may be cached. You are now ready to start enjoying the benefits of using Privoxy!
Privoxy is typically started by specifying the main configuration file to be used on the command line. If no configuration file is specified on the command line, Privoxy will look for a file named config in the current directory. Except on Win32 where it will try config.txt.
5.2. Debian
# /etc/init.d/privoxy start |
5.3. SuSE
# rcprivoxy start |
5.5. Solaris, NetBSD, FreeBSD, HP-UX and others
# /usr/sbin/privoxy /etc/privoxy/config |
5.7. Mac OSX
/Library/Privoxy/StartPrivoxy.command |
5.9. Gentoo
A script is again used. It will use the file /etc/privoxy/config as its main configuration file.
/etc/init.d/privoxy start |
rc-update add privoxy default |