[Top] [Prev] [Next] [Bottom]
[Contents]
Tutorial 1: Creating a Static Hyperlink
In this tutorial, you will make a static hyperlink using Sapphire/Web. Begin by making and changing into the directory $HOME/tut1. Then start Sapphire/Web.
- 1. At the Project Window (Fig. 3-1), bring up the Document Manager window by clicking on the
Document Manager icon or by selecting the menu item Tools->Document Manager...
- The Document Manager (Fig. 3-2) is used to create, modify, and delete the HTML documents that you use in your project, or to add existing documents.
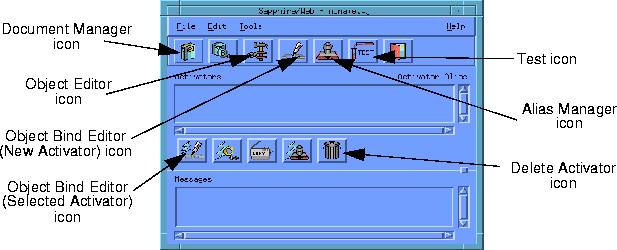
Figure 3-1 Project Window
- 2. In the Document Manager, click the
Create New HTML button or select the menu item File->Create to start work on a new HTML document.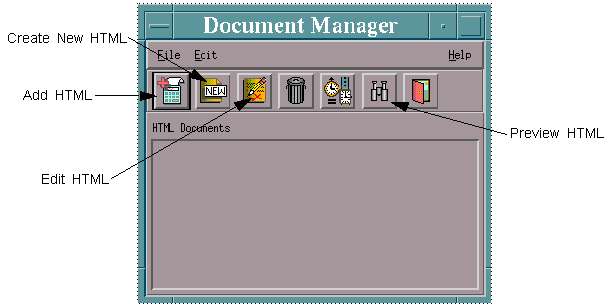
Figure 3-2 Document Manager
- 3. Type begin.html as the name of the first HTML document. Change begin.html
to the following:
<HTML>
<HEAD><TITLE> Initial Document </TITLE></HEAD>
<BODY>
This is the first document. Click <A HREF="GO">
here</A> to go to the next.
</BODY>
</HTML>
- Note that here is a hyperlink to
GO. You will use Sapphire to make the Anchor HREF=GO point to a real HTML document.
- Note: There's nothing special about the Anchor name GO. You should choose Anchor names that describe the role of each Anchor in the project.
- 4. After you have changed and saved begin.html with your chosen editor, notice that begin.html is now listed in the Document Manager window. Select begin.html from the HTML Documents list and click the
Preview HTML icon. Your chosen browser should display your document (Fig. 3-3).

- 5. Create another HTML document called end.html using steps 2 and 3.
- 6. Using your HTML editor, change end.html to the following:
	<HTML>
	<HEAD><TITLE> Final Document </TITLE></HEAD>
	<BODY>
	This is the final document. Cool.
	</BODY>
	</HTML>
- 7. Select end.html from the list in the Document Manager and click the
Preview HTML icon. Your browser will display end.html (Fig. 3-4).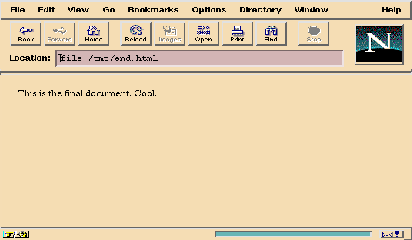
Figure 3-4 Browser view of end.html
Binding the HTML Documents
Now that you have created two HTML documents, you will create a binding between them.
- 1. At the Project Window, open the Object Bind Editor by clicking the
Object Bind Editor (New Activator) icon, or by selecting the menu item Tools->Object Bind Editor (fig 3-1).
- An intermediate window will appear.
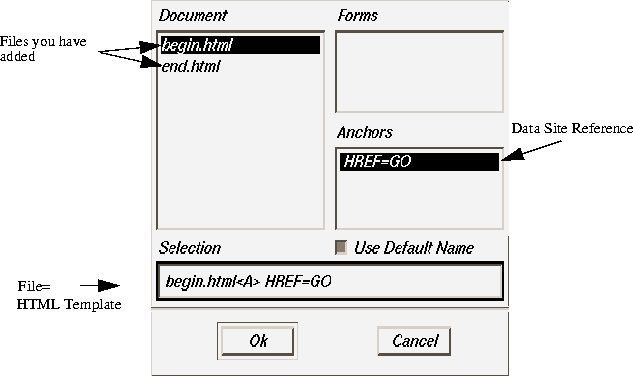
Figure 3-5 Object Bind Editor's Intermediate Window
- 2. In the Document section, select begin.html. In the Anchors section, select
HREF=GO. Click Ok. You will now tell Sapphire what the Anchor HREF=GO should do.
- The Open Procedure window will appear.
- 3. In this window, click on the arrow button to bring up the menu of bind types. Select
NULL. NULL bindings are used to move between HTML pages when there is no object in use.
- 4. Click
Ok. This will open the Object Bind Editor (Fig. 3-6).
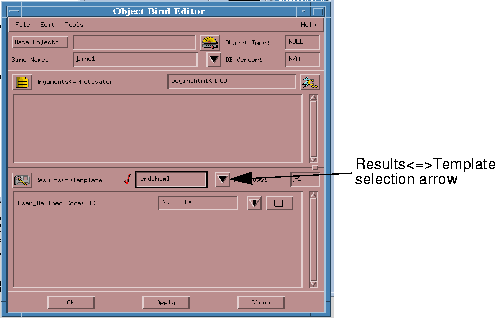
- 5. In the Object Bind Editor click the down arrow next to
Results<=>Template. Select end.html.
- 6. Click
Ok. Since this is a NULL binding, no additional work is required. You have defined the Anchor HREF=GO as a NULL binding that links to end.html.
Testing Your Project
- 1. At the Project Window, click the
Test icon (Fig. 3-1).
- 2. Save your project as:
test.pj.
- If the project was successfully built, the following messages will be displayed in the Messages area of the Project Window:
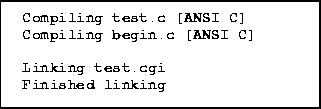
Figure 3-7 Project Window Messages
The test procedure will start your chosen browser with begin.html. When you click on here, the browser will go to end.html.
- Note: Some system configurations will prompt the message "Netscape: Fatal Error" when testing your project. To remedy this, from the main project window choose Edit->Options. Change the Category to Project. Edit the CGI URL, CGI Path, HTML URL, and HTML Path options so that they point to the appropriate places. Save your options and retest the project.
You may have noticed that creating a static link with Sapphire/Web is no faster than creating the link "by hand." The advantages of Sapphire will become apparent in the next tutorial, when you will create a Data Object and bind it to an Anchor in a few simple operations.
From the Document Manager, select end.html and click the Edit HTML icon (Fig. 3-2). Add an Anchor to end.html. Link end.html to begin.html. Save and Test the project.
[Top] [Prev] [Next] [Bottom]
[Contents]
info@bluestone.com
Copyright © 1997, Bluestone. All rights
reserved.


