![]()
This section describes the simple and quick procedures you must follow in order to begin using VypressMessenger.
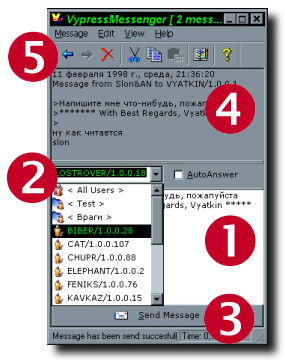
At once to begin using VypressMessenger it is necessary to make only five simple steps.
 |
Enter in the
bottom window text of the message, which you want to send to one or several of the
friends. The text of the message can have the length up to 64 kilobytes and may contain
any symbols. While sending your AutoSignature will be automatically added to the text of
the message, if you switched on this option.
|
 |
Enter in the
address line (located on central splitter) or choose from the dropping down list address
of the computer, which you want to send the message. You can also choose group of the addresses from the list, or special group < All Users > (in this case message will be dispatched to all users outside of any groups). If you want users or groups to appear in the list, it is necessary to enter their addresses in the Address Book. Besides, you can simply enter some addresses, dividing them by symbol ";" (semicolon). VypressMessenger uses protocol TCP/IP, therefore you should enter the IP-address of the computer or its name from DNS (if the sense of this phrase is not clear to you, consult your system administrator or more skilled comrades). Besides, in Local Area Networks you can simply write down name of the computer, which you see in "Network Neighborhood".
|
 |
Now press the
button "Send Message" and your message will be sent. If everything was made correct and your addressee is on a network in the current moment with VypressMessenger (or compatible program) started, you will see such a window (if, certainly, you have not turn off in Preferences this option): 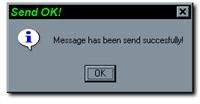 If you have seen such window, it means that your message WAS GUARANTEED delivered to the addressee (or all addresses). Unlike WinPopup, VypressMessenger makes you always know fore sure, whether your message was received. If you
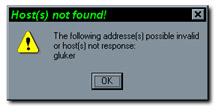
were not lucky and your addresses (or at least one of the several addresses) is not
present in the current moment on a network, or they have not started VypressMessenger, or
for any reason the message has not reached them - then you will see a window like this:
|
 |
In the top window,
you can see the messages, coming to you, from your friends and acquaintances. You can flexibly operate what messages will be displayed in the top window, using the mechanism of a filtration of the messages and Address Book. The very first line of the message contains date, time and day of
week, when the message was received.
|
 |
At last, you can pass from one message to another and delete the current message with the help of buttons on the toolbar. |
Here we have described only most simple and necessary features of VypressMessenger. Certainly, you have enough for use the program û but by studying the documentation closely, you can optimize VypressMessenger on your own tastes and requirement, by making, thus, work with it faster and comfortable.