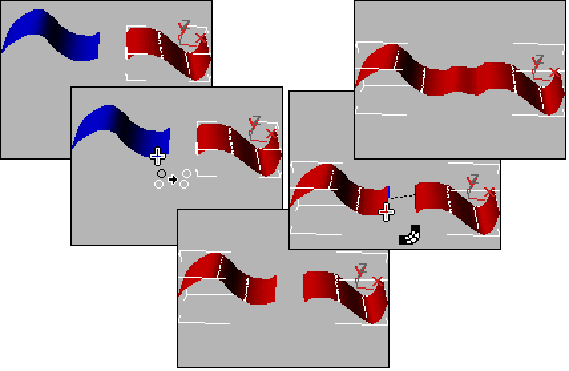


A blend surface connects one surface to another, blending the curvature of the parent surfaces to create a smooth surface between them.

Blend surface connecting two other surfaces
When you turn on the Blend button, and while a blend surface sub-object is selected, a rollout with the blend parameters appears at the bottom of the command panel
"Tension" affects the tangent between a parent surface and the blend surface. The greater the tension value, the more closely the tangent parallels the parent surface, and the smoother the transition. The lower the tension, the greater the tangent angle and the sharper the transition between parent and blend.
Tension 1: Controls tension at the edge of the first surface you clicked.
Tension 2: Controls tension at the edge of the second surface you clicked.
Flip End 1 and Flip End 2: Flip one of the normals used to construct the blend. A blend surface is created using the normals of the parent surfaces. If the two parents have opposing normals, this can lead to a blend surface shaped like a bow tie. To correct the situation, use Flip End 1 or Flip End 2 to have the blend constructed using a normal opposite the corresponding parent surface’s normal.
3DS MAX creates the blend surface. Changing the position or the curvature of either parent surface will change the blend surface as well.