

Using the NURBS Toolbox to Create Sub-Objects
Besides the rollouts at the NURBS object level, you can use the NURBS toolbox to create sub-objects.

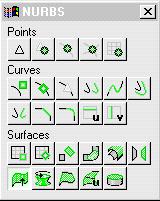
Toolbox for NURBS curve objects
Toolbox for NURBS surface objects
The toolbox contains buttons for creating NURBS sub-objects. From a curve object, you can create points or other curves. From a surface object, you can create points, curves, or other surfaces.
Reference
In general, the toolbox behaves like this:
-
While the button is turned on, the toolbox is visible whenever a NURBS object or sub-object is selected and you are in the Modify panel. It disappears whenever you deselect the NURBS object or make a different panel active. When you return to the Modify panel and select a NURBS object, it reappears.
-
The toolbox’s on/off state is saved in the 3dsmax.ini file.
-
You can use the toolbox to create sub-objects either at the top, object level or at any NURBS sub-object level.
-
When you turn on a toolbox button, you go into creation mode, and the Modify panel changes to show the parameters (if there are any) for the kind of sub-object you are creating.
-
If you are at the top, object level and use the toolbox to create an object, you must then turn on Sub-Object to edit the new sub-object. (This is no different from using the buttons in the rollouts.)
-
If you are at a sub-object level and use the toolbox to create an object of the same sub-object type, you can edit it immediately after you turn off the create button (or right-click).
-
If you are at a sub-object level and use the toolbox to create an object of a different sub-object type, you must use the drop-down to change the sub-object level before you can edit the new sub-object.
How To
To see the toolbox:
-
With the NURBS object selected, go to the
 Modify panel’s Display area.
 -
 Turn on NURBS Creation Toolbox.