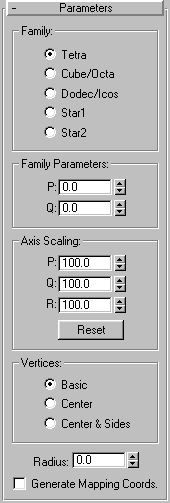


The Hedra button on the Creation command panel produces a family of polyhedra.

Selects the type of hedra created
P, Q: Interrelated parameters that provide a two-way translation between the vertices and facets of a polyhedron. They share the following:
In the simplest terms, what P and Q do is change the geometry back and forth between vertices and facets. At the extreme settings for P and Q, one parameter represents all vertices, the other all facets. Intermediate settings are transition points, with the midpoint an even balance between the two parameters.
Polyhedra in 3DS MAX can have as many as three kinds of polygonal facets, such as triangle, square, or pentagon. These facets can be regular or irregular. If a polyhedron has only one or two types of facet, only one or two of the axis scaling parameters are active. Inactive parameters have no effect
P, Q, R: Controls the axis of reflection for one of the facets of a polyhedron. In practice, these fields have the effect of pushing their corresponding facets in and out. Defaults=100.
The following figure shows a variation of the dodecahedron that has its Q and R axes scaled above and below 100, the mean value representing the object’s original setting.
Reset: returns axes to their default setting.
The Vertices settings determine the internal geometry of each facet of a polyhedron. These settings are illustrated in the following figure. They cannot be animated.
The Center and Center & Sides options increase the number of vertices in the object and therefore the number of faces. If you scale the axis of the object, the Center option is used automatically, unless Center & Sides is already set.
To see the internal edges shown in the figure, you need to uncheck Edges Only on the Display command panel.
Radius: Sets the radius of any polyhedron in current units.
Generate Mapping Coordinates: Sets up required coordinates for applying mapped materials to the hedra. Default=clear.
As you drag, a polyhedron emerges from the pivot point.