

Selects the Mix map type and adds it to the current material in the Material Editor sample window.
The Mix material lets you mix two colors or maps on a single side of the surface.
Mix has an animatable Mix Amount parameter that enables you to draw map morphing function curves to control the way that the two maps are blended over time.
For the Mix map type, you can set or modify the following parameters:
Color # 1 and Color # 2: Click to display the Color Selector to select the two colors to be mixed.
Mix Amount: Determines the proportion of the mix. 0 means only Color 1 is visible on the surface, 1 means only Material 2 is visible. You can also use a map instead of the mix amount. The two colors will mix in greater or lesser degree according to the intensity of the map.
Maps: Click to select or create the bitmaps or procedural maps to be mixed along with the color.
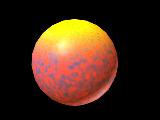
Controls how gradual or how sharp the transition between the two colors being mixed will be (this really only has meaning when you have a map applied to Mix Amount). Try mixing two standard materials using a noise map as a mask for some interesting mottled effects.
Use Curve: Determines whether the Mixing Curve effects the mix.
Transition Zone: Adjusts the level of the upper and lower limits. If the two values are the same, the two materials will meet at a definite edge. Wider ranges give more gradual mixing.
For a Mix map, you can set or modify the following parameters under Output:
Invert: Inverts (reverses) the hues of the bitmap, like a negative color photo. Default = off.
Clamp: When on, this parameter limits the values of the colors to no greater than 1.0. Turn this on when you’re increasing the RGB Level, but don’t want the map to appear self-illuminated. Default = off.
Note: If you set the RGB Offset to a value greater than 1.0 while Clamp is on, all colors become white.
Alpha from RGB Intensity: When on, an alpha channel is generated based on the intensity of the RGB channels in the map. Black becomes transparent and white becomes opaque. Intermediate values are translucent according to their intensity. Default = off.
Output Amount: Controls the amount of the bitmap being mixed into a Composite material. Default = 1.0.
RGB Offset: Adds to the RGB values of the bitmap colors by the amount set by the spinner, which affects the tonal value of the colors. Eventually the bitmap becomes white and self-illuminated. Lowering the value decreases the tonal value towards black. Default = 0.0.
RGB Level: Multiplies the RGB values of the bitmap colors by the amount set by the spinner, which affects the saturation of the color. Eventually the bitmap becomes fully saturated and self-illuminated. Lowering the value decreases the saturation and makes the bitmap colors grayer. Default = 1.0.
Bump Amount: Adjusts the amount of bumpiness. This value has an effect only when the bitmap is used as a bump map. Default = 1.0.
For example, suppose you have a map instanced for both the Diffuse and the Bump components. If you want to adjust the amount of bumpiness without affecting the Diffuse colors, adjust this value, which changes the amount of bumpiness without affecting the map’s use in other material components.
Mix maps have their own set of parameters.
The Browser appears so you can select a map type.
Mix Amount is the percentage of Color #2 used in the mix.
You can also control the mix amount by using a map.
The Browser appears so you can select a map type.
The intensity of pixels in this mixing map controls the mix. When the intensity is close to zero, one of the component colors or maps is visible; when it is close to full intensity, the other component is visible.
Tip: Using a Noise map for the mixing map can give good effects that have a natural appearance.
In the Mix Parameters rollout, Mix Amount is grayed out while a map is assigned to this parameter. If Use Curve is off, the mixing map is used as is. If Use Curve is on, you can shift the effect of the mixing map's gradient ramp, offsetting it one way or the other and revealing more or less of the mix components.