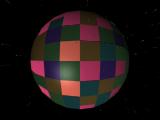


Selects the Multi/Sub-object material type and adds it to the current material in the Material Editor sample window.
The Multi/Sub-object material lets you assign different materials at the sub-object level of your geometry. You create a multi-material, assign it to an object, and then use the Mesh Select modifier to select faces and choose which of the sub-materials in the multi-material are assigned to the selected faces.
For a Multi/Sub-object material, you can set or modify the following basic parameters:
Set Number: Sets the number of sub-materials that make up the material. At the Multi/Sub-object material level, the sample window’s sample object shows a patchwork of the sub-materials. (When you edit a sub-material, the sample window display depends on the setting of the Simple Multi Display Below Top Level toggle in the Material Editor Options dialog.)
Click the button to create or edit one of the sub-materials. Each of the sub-materials is a complete material in its own right, with as many maps and levels as you want. Click on the color swatch to the right of the wide buttons to display the Color Selector.
The material’s number is followed by a text box that lets you enter a custom name for the material. The material number on the left (not on the button) is the material ID the sub-material is assigned to.
The check boxes to the right let you turn off a sub-material, making it invisible in the scene and the sample window.
A scroll bar appears to the right of the material list, letting you move among the sub-materials. (You can view up to ten sub-material entries at a time.)
The controls for a Multi/Sub-Object material are essentially a list of the materials it contains.
The Browser appears to let you choose a material type.
The color selection dialog appears to let you choose a color.
Warning: If you reduce the number of maps, previously assigned maps can be lost.
Use the scrollbar to move through a material list that is longer than the rollout.
The material numbers in the Multi/Sub-Object material and the material ID numbers in the Edit Surface rollout correspond. If you set the ID to a number that doesn't correspond to a material contained in the Multi/Sub-Object material, the faces render as black.