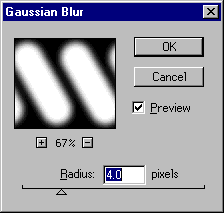
On a real bin the sides have thickness. The holes have a rounded edge at the front. This adds realism to the bin. To do this we need to make an altitude map. An altitude map makes a surface thicker depending on how white the map is at that point. For example gray makes the surface a bit thicker but white makes the surface a lot thicker. Go back to your paint program and open the holes image if it is not already open. Gaussian blur it to mix the edges together. In Photoshop click Filter, Blur, Gaussian Blur and choose how much blur you want. I used 4 pixels radius but it depends on how big you want the rounded bit around the holes to be. Note: To gaussian blur in Paint Shop Pro click Image. Blur, Gaussian Blur.

 Save this image in the same directory as your bin (File, Save As). Now go back to Imagine and Duplicate the Specular map (Duplicate). Double click on the bottom Specular map. Click the Names tab and change the Label to Altitude. Click the Browse box next to Filename and select the altitude map you just saved. Click the Usage tab and click Altitude. Click Apply and you should have a preview window like the one above.
Click OK to get back to the normal Attributes window then OK again to get back to the normal Imagine window.