Accessing Protocols
Make sure the instance switch is on in the Class View and select add... from the Protocol View [Operate] menu. A dialog box will appear. Enter "accessing" and click OK. A message template will appear in the Code View as depicted in Figure 5.3.
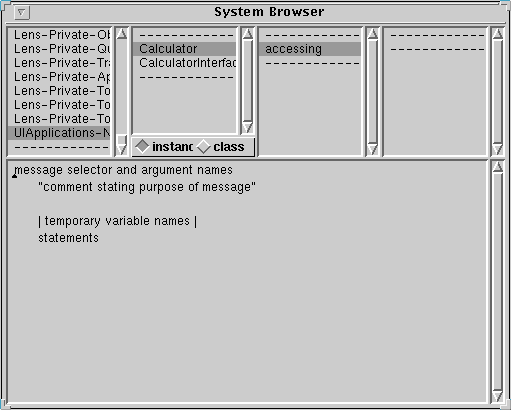
Figure 5.3
Replace the entire method template in the Code View with:
operand1
	^operand1
Choose accept from the Code View [Operate] menu. Add the following messages (methods) and choose accept from the Code View [Operate] menu after adding each.
operand2
	^operand2
operand1: aValue
	operand1 := aValue
operand2: aValue
	operand2 := aValue
Action Protocols
Create another protocol by choosing add... from the Protocol View [Operate] menu. Enter "actions" in the dialog box and click OK.
Add the following messages (methods) under the actions protocol in the Code View and choose accept from the Code View [Operate] menu after entering each.
This completes the implementation of the Calculator class.
add
	^(operand1 + operand2)
sub
	^(operand1 - operand2)
Note that we would
normally test this class in a workspace before proceeding with the remainder
of the implementation. It is left as an exercise for the reader to create an
instance of the calculator class and to test the methods that have been defined
for the class.
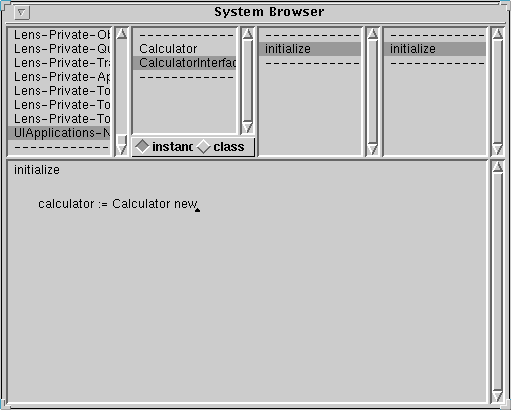
A calculator window (canvas) is an instance of the CalculatorInterface
(application model) class. We associate an instance of our Calculator (domain
model) class with each money calculator GUI by having an instance of Calculator
as the value of an instance variable in CalculatorInterface. So we now modify
the CalculatorInterface class to contain an instance variable for a Calculator.
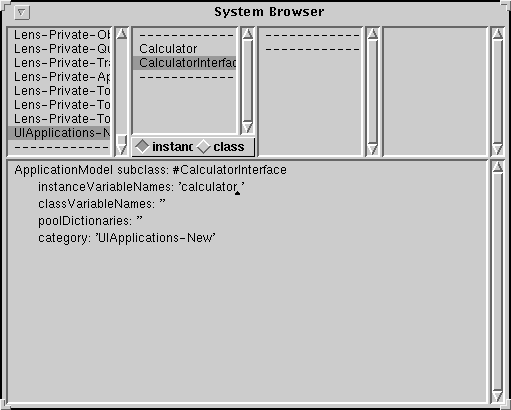
Select CalculatorInterface from the Class View and get the class definition in
the Code View. (In order to display the class definition, you will probably
have to toggle the category away from, and
then back to, UIApplications-New, or alternatively click on the class button
and then the instance button, or select definition from the
Class View [Operate] menu.) Add an instance variable "calculator" in the class
definition as depicted in Figure 5.4, and choose accept from the Code
View [Operate] menu.
For the + action button do the following:
- Select the widget. If some of the widgets are still grouped together use the Arrange->Ungroup option from the Canvas Tool to ungroup the widgets.
- Using the Properties Tool enter "add" in the Action field (and Apply).
- Click Define on the Canvas Tool.
- Click OK on the UIDefiner.
Repeat for the other two action buttons using "sub", and "clear" as the respective Action field values. Install, and close the Properties Tool and the Canvas/Canvas Tool/Palette.
When you specify an action property for an action button and use the Define option, the UIDefiner automatically creates a default method whose name is the value you entered in the Action field using the Properties Tool. When an action button is activated (by selecting it when an application is running), that method is invoked. So you now need to modify the UIDefiner's default methods to provide code that performs add, subtract, and clear actions.
If a System Browser is not open, then open one now. Select the UIApplications-New category, the CalculatorInterface class, and the actions protocol. (If the browser was already open, you may need to deselect the CalculatorInterface class and reselect it to get the actions and aspects protocols.) There should be add, clear, and sub methods in the Method View. Select each of the methods add and sub, and replace its UIDefiner default method with its corresponding code listed below. Remember to choose accept from the Code View [Operate] menu after editing each method.
add
	calculator operand1: value1 value.
	calculator operand2: value2 value.
	result value: calculator add
sub
	calculator operand1: value1 value.
	calculator operand2: value2 value.
	result value: calculator sub
You have now linked the above code to the + and - action buttons on the money
calculator main interface window. When + is selected, the message "add" will
be sent to the interface window object (CalculatorInterface instance) and when
- is selected, the message "sub" will be sent.
To complete the clear method for the Clear action button,
from the System Browser select the CalculatorInterface class, the actions protocol, and the clear method. Replace the UIDefiner default method with the code below. Choose accept from the Code View [Operate] menu.
(This method uses the predefined method "openDialogInterface:" to open the
dialogSpec dialog window and return its result. The predefined methods "cancel"
and "accept", used as actions for NO and YES, return false and true,
respectively.)
Our final step is to complete the menu bar. We need to associate actions with
each of the menu options.
From a Resource Finder, select the CalculatorInterface class and the menuBar
resource. Select Edit, and the Menu Editor will appear. Change the
text in the Menu Editor text window as shown in Figure 5.7 to associate the
appropriate actions with the menu selections.

Figure 5.7
(Note: closeRequest is a predefined close action for windows.) Click on
Build, then Install to complete the menu bar installation.
Close the Menu Editor.
The money calculator is now complete. To save your work, save your image or file out the CalculatorInterface class.
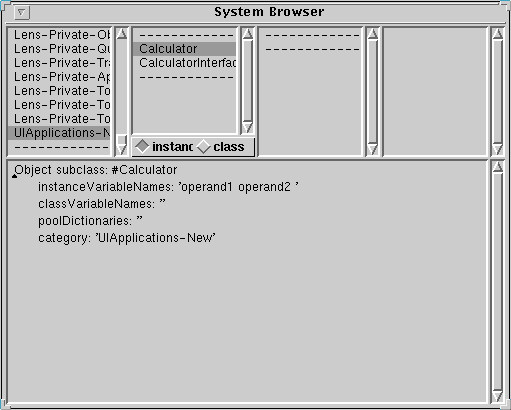
 . Recall that the four areas across the top of the System Browser are the Category View, the Class View, the Protocol View, and the Method View, and the lower part of the System Browser is the Code View. Scroll down through the categories and select the UIApplications-New category. A template for a class should be displayed in the Code View as depicted in Figure 5.1.
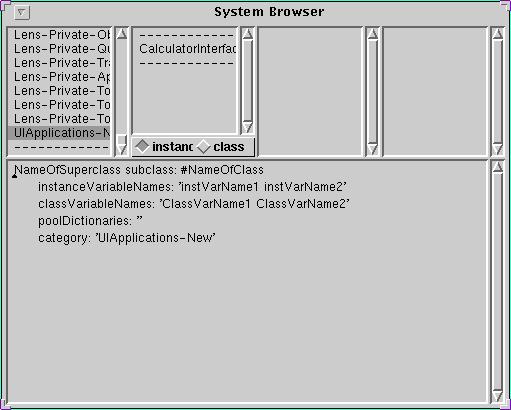
 . Select View->User Classes from the Resource Finder Menu. Select the CalculatorInterface class and windowSpec resource on the Resource Finder, as shown in Figure 5.6.


