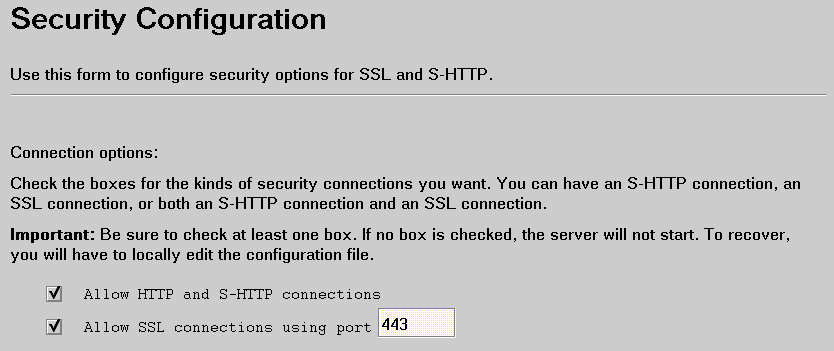
For an overview of security and an explanation of SSL, see Chapter 9. "Making your communications secure".
HTTPS is a unique protocol that combines SSL and HTTP. You need to specify https:// as an anchor in HTML documents that link to SSL-protected documents. A client user can also open a URL by specifying https:// to request an SSL-protected documents.
Because HTTPS (HTTP + SSL) and HTTP are different protocols and usually use different ports (443 and 80, respectively), you can run both SSL and non-SSL requests at the same time. As a result, you can choose to provide information to all users using no security, and specific information only to browsers who make secure requests. This is how a retail company on the Internet can allow users to look through the merchandise without security, but then fill out order forms and send their credit card numbers using security.
A browser that does not have support for HTTP over SSL will naturally not be able to request URLs using HTTPS. The non-SSL browsers will not allow submission of forms that need to be submitted securely.
To implement security you need to specify the port you'll use for secure network communications. If the server needs to ensure who a client is before responding, you need to set up SSL client authentication. When you set up SSL client authentication, the server requests a client's certificate whenever the client makes an https request.
Also, the server must have a public-private key pair and a certificate.
The server uses its private key to sign messages to clients. The server sends its public key to clients so that they can encrypt messages to the server, which the server decrypts with its private key.
To send its public key to clients, the server needs a certificate. The certificate contains the server's public key, the Distinguished Name associated with the server's certificate, the serial number of the certificate, and the expiration date of the certificate.
A certificate is issued by a certification authority (CA), who verifies that you are who you say you are.
To conduct commercial business on the Internet, you would use a CA, such as VeriSign, Inc., who is widely known by clients and servers to get a server certificate. If you plan to implement SSL client authentication, clients can also get their certificates from a CA such as Verisign. The VeriSign home page at https://www.verisign.com/enroll.s contains instructions for how clients can obtain certificates.
For a private Web network within your own company, university, or group, you could, with your Internet Connection Secure Server, be your own CA. To learn how to become your own CA and process certificates for this server and other clients and servers, see Chapter 11. "Acting as a certification authority for a private Web network".
Use the following Configuration and Administration forms to set up SSL security:
To access the Configuration and Administration forms:
Use the Security Configuration form to specify some of the security information needed for your server.
Use the first part of the Security Configuration form to specify your connection for SSL and to set up SSL client authentication.

Check the box to allow SSL connections and, optionally, to allow HTTP connections. In addition, if the server needs to verify who a client is before responding, you can check the box to set up SSL client authentication. Authenticating clients increases network traffic. If you set up SSL client authentication, the server requests a certificate when a client makes an https request.
Check your form and make sure you entered each item correctly. Click Apply to process the form.
You receive a Confirmation that the form was successfully processed. You can make changes to other Configuration and Administration forms. However, when you are ready for the changes you've made to this form to take effect, you must stop the server and then start it again. The server will not pick up your changes if you only restart it.
For SSL, the server must have a public-private key pair and a certificate.
These instructions tell you how to use this form to do one of the following:
To create the server's public-private key pair and request a certificate, use:
Use the Create Key and Request Certificate form to specify the CA from whom you want to obtain a certificate.
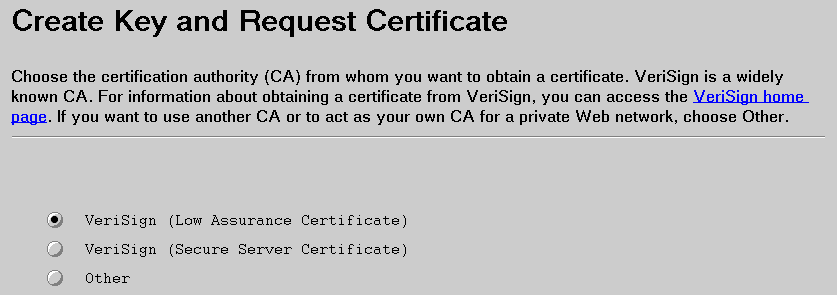
VeriSign is a widely known CA. Choose one:
Click Apply to process this part of the Create Key and Request Certificate form.
Another part of the Create Key and Request Certificate form appears, depending on which CA you choose:
Use Create Key to create a key pair.

Specify a meaningful, unique name to identify the key pair. The key name is the label that identifies the key pair and certificate in the key ring. You may use non-alphanumeric characters in key names; however, keep in mind that some platforms have special uses for some of these characters.
Specify the fully qualified path and file name for the key ring file. A key ring is a file where the server keeps one or more key pairs and certificates. If you specify a file that doesn't exist, the server creates the file for you.
Specify the size of the key pair in bits after considering these factors:
Use this part of the form to specify the password that protects the key ring.

The password must be from the U.S. English character set.
The password is important because it protects the server's private key. The server's private key is the only key that can decrypt messages encrypted with the server's public key. Also, the server signs documents with its private key.
The security of the server's private key depends upon this password. Here are some commonly accepted rules for specifying passwords:
Type the password twice to ensure that you have typed it correctly.
If you must record the password, make sure it is stored in a well-secured place.
The key ring password must be specified when the server is started. Check Automatic login if you want the server to stash the password and specify it for you whenever the server is started. To stash the password, the server encrypts the key ring password and puts it in a file that has the same name as the key ring file, except the extension is .sth.
Stashing your password is less secure so it's generally a good practice not to stash it. However, there may be cases where you need to stash the password; for example, if you have a remote server and you want it to automatically restart after a power failure.
Note: If you installed your server as an NT service, you must stash the password. If the password is not stashed, the server will start but you won't have any security.
Next, to request the server's certificate, fill in the rest of the form.
Specify the Distinguished Name you want associated with the server's certificate and used to identify the server's public key. In it's simplest form, a Distinguished Name is someone's name.
The information you provide for Distinguished Name depends upon whether you want a:
For this certificate, the Distinguished Name is the full name of the user for whom the certificate is being requested.
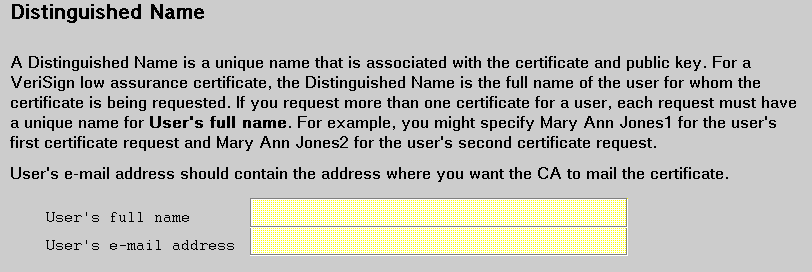
For User's full name, specify the user's full name and make sure it is unique. For example, if you request more than one certificate for Mary Ann Jones, you might specify Mary Ann Jones1 for the first request and Mary Ann Jones2 for the second request.
User's e-mail address should contain the user's address where you want VeriSign to mail the certificate.
Next, you need to provide mailing information, as described in "6. Specify mailing option".
For these certificates, the Distinguished Name is the server name and the location of the server.
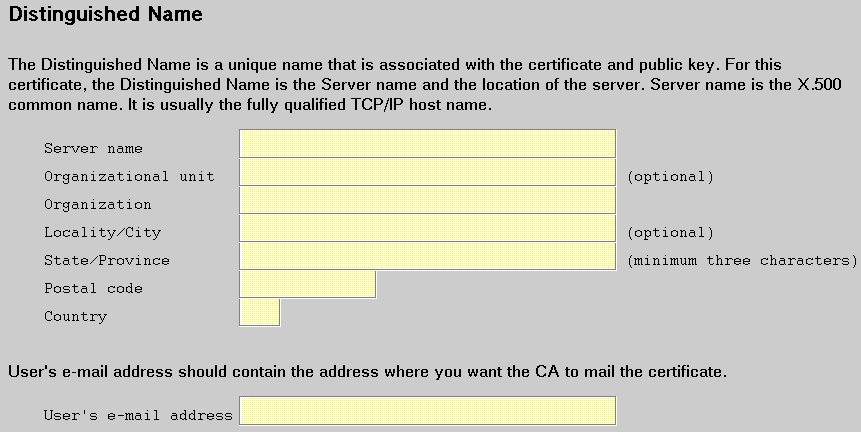
Note: The text for Distinguished Name will vary, depending on whether you're on the VeriSign Secure Server Certificate form or the Other Certificate form. Also, the User's e-mail address field, which is on the Other Certificate form, is not on the VeriSign Secure Server Certificate form.
You may use non-alphanumeric characters in Distinguished Name; however, keep in mind that some platforms have special uses for some of these characters. Provide the following information for Distinguished Name:
On the Other Certificate form, User's e-mail address should contain the user's address where you want the CA to mail the certificate. If you're requesting this server's certificate, which you plan to process as a CA, leave this field blank.
The mailing option depends on the kind of certificate being requested:
A VeriSign low assurance certificate request must be electronically mailed to VeriSign. If you are behind a firewall, verify with your system administrator what you need to do to electronically mail this request.

Go to "7. Save copy of certificate request" for a description of what you need to do next.
There is no mailing option on the form for a VeriSign secure server certificate. A secure server certificate request must be saved in a file and manually mailed to VeriSign. The VeriSign home page, https:;//www.verisign.com/enroll.s, has instructions on what you need to provide in order to obtain a secure server certificate from VeriSign. Some e-mail programs may alter files and should not be used to send a certificate request. For example, some programs may pad the lines of a certificate request with blanks and invalidate it. Also, if you are behind a firewall, verify with your system administrator what you need to do to electronically mail this request.
Go to "7. Save copy of certificate request" for a description of what you need to do next.
For an Other certificate, you need to consult with your CA to determine how to mail the certificate request.

After consulting with your CA, choose one:
It's a good idea to save the certificate request in a file. If you're requesting a VeriSign secure server certificate, you must save the request to file and manually mail it later. If you're acting as your own CA for this server's certificate, you also must save the certificate request in a file. (After you complete this form, you can use the instructions in Chapter 11. "Acting as a certification authority for a private Web network" to become a CA and to process this server's certificate.)

Note: The text on this form for Save Copy will vary, depending on whether you're on the VeriSign low assurance, VeriSign secure server, or Other certificate form.
Specify a unique fully qualified path and file name for the file where you want to keep the certificate request. If you specify a file that doesn't exist, the server creates the file for you.
Check your form and make sure you entered each item correctly. Click Apply to process the form. You receive a Confirmation that the form was successfully processed.
The server:
The CA processes your certificate request. When the CA is satisfied that you have met all of its requirements, it electronically mails a certificate to you. Next, you need to receive the server's certificate into the key ring that contains the public-private key pair.
Use the Receive Certificate form to receive into the key ring the certificate electronically mailed to you by your CA.
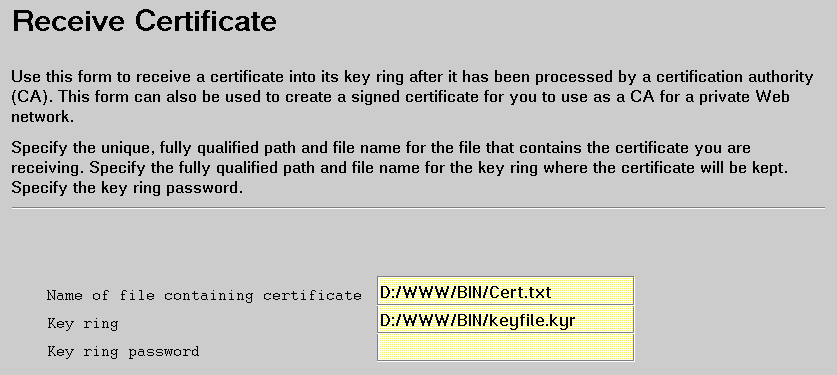
Before filling in this form, use your e-mail program to receive the certificate into a unique file. Some e-mail programs may alter files and should not be used to receive certificates. For example, some programs pad the lines of the certificate with trailing blanks, which invalidates it.
For the Receive Certificate form, provide:
Check your form and make sure you entered each item correctly. Click Apply to process the form.
You receive a Confirmation that the form was successfully processed.
The server stores the certificate in the key ring. It is referenced in the key ring with the key name you specified on the Create Key and Request Certificate form.
After you receive your Confirmation for the Receive Certificate form, you can make changes to other Configuration and Administration forms. However, when you are ready for the changes you've made to any security forms to take effect, you must stop the server and then start it again. The server will not pick up your changes if you only restart it.
When you start the server, you will be prompted for the key ring password unless you stashed it by selecting Automatic login on the Create Key and Request Certificate form.
With SSL V3, you can set up your server for SSL client authentication. The server requests a certificate from any client making an https request. The server establishes a secure connection whether or not the client has a valid certificate.
You can restrict who can access documents by using password files and/or user or group authentication in protection setups as described in Chapter 7. "Protecting your server". You can further restrict who can access documents by coding SSL client authentication parameters on protection setups, ACL files, or both. See "Creating protection setups for SSL client authentication" for more information on coding protection setups. See "Step 5. Limiting access to individual files" for more information on coding ACL files.
Once you have a key pair and a signed certificate, you can begin serving SSL protected documents to SSL browsers.
Before you begin using SSL, you should consider doing the following: