

The Attachment controller is a Position controller that attaches an object's position to a face on another object (the target object doesn't have to be a mesh, but must be able to convert itself to a mesh).
By keying different attachments over time, you can animate the position of an object over the irregular surface of another object, even if that surface is changing over time.
Parameters for this controller are available in Motion Panel/Parameters, after the controller has been assigned.

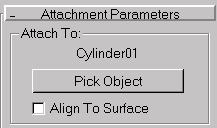
Object Name text: The name of the target object to which the source object is attached.
Pick Object: Select and pick the target object in the viewports to perform the attachment.
Align to Surface: Fixes the orientation of the attached object to the face where it’s assigned. When this is clear, the orientation of the attached object is not affected by the orientation of the face on the target object.


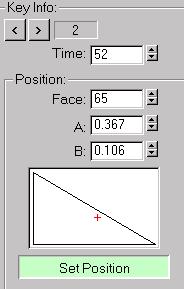
Current Key: Displays the current key number and lets you move to another key.
Time: Displays the current frame, and lets you move the current key to a different frame.
Position area
Face: The index of the face where the object is attached. (Spinner Value: int, 0 to 268435455 (FFFFFFF hex)
A: and B: The barycentric coordinates defining the position of the attached object on the face. (Spinner Value: float, -999,999 to 999,999)
Display window: Shows the position of the source object within the attachment face. You can drag within this window to adjust the position of the object relative to the face.
Set Position: Adjusts the placement of the source object on the target object. Drag over the target object to specify a face, and a position within the face. The source object moves accordingly over the target object.

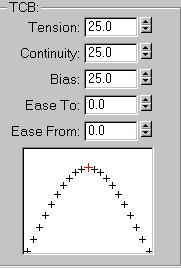
All of the items in this area are the same as in other TCB controllers. The orientation of the source object is also interpolated and affected by these settings.
Tension: (Spinner Value: float, 0 to 50)
Continuity: (Spinner Value: float, 0 to 50)
Bias: (Spinner Value: float, 0 to 50)
Ease To: (Spinner Value: float, 0 to 50)
Ease From: (Spinner Value: float, 0 to 50)
Create the two objects, and animate the cylinder:
The cylinder bends from one direction to the other over 100 frames.
The cone moves to the origin of the scene, and the Attachment Parameters rollout appears.
The name of the cylinder appears above the Pick Object button.
Go to frame 0, and Arc Rotate the Perspective viewport so you can see the top surface of the cylinder.
Note: The following step creates a key at whichever frame you’re on. If you perform it at a non-zero frame, a single key is created at that frame, and not at frame zero, so no animation results, unless you perform the step again at a different frame.
The cone jumps to the top of the cylinder. As you drag the mouse, it jumps to whichever face you drag over.
As the cylinder bends back and forth, the cone remains attached to its upper surface. You can continue adjusting the A and B spinners, as well as dragging in the face display window to adjust the cone’s position.
The Face spinner specifies which face the cone is attached to. As you change its values, the cone moves to different faces on the cylinder.
The cylinder bends back and forth with a cone glued to its upper cap.