

![]()
The IK Controller requires that you use the Bones system. When you create the bones, a slave IK controller is assigned to each bone. All of the slave IK controllers in a single hierarchy are, in turn, controlled by a master IK controller (controls for the master IK controller are in Motion Panel/Parameters). When you edit the IK controller for any selected bone in the Motion Panel, you’re actually editing the IK settings for all of the bones.
A Bones system is a jointed, hierarchical linkage of "bone" Objects. You cannot render bones. Bones are used as an armature on to which objects are linked. If a "skinning" system is available, such as Character Studio Physique, you can use it to "skin" an object to the bones.
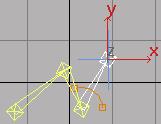
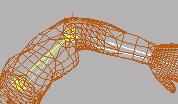
Create/System/Bones: Creates bones. Parameters specify how the IK Controllers are assigned to the bones during creation. The Auto Boning system can automatically assign bones to an existing hierarchy. Once the bones are created, their controllers provide an IK solution automatically.
Note: You should not turn on the IK toggle on the toolbar when using IK Controllers.
Motion Panel: Though a single bone in a bone hierarchy may be selected, changing the IK Controller Parameters in the Motion Panel affects the entire chain. Use parameters here to assign, remove, and edit the end effector for the currently selected joint.
Hierarchy/IK Panel: With the exception of the Inverse Kinematics rollout (Apply IK is not necessary with the IK Controller), controls here affect the IK Controller.
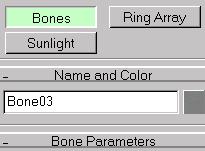
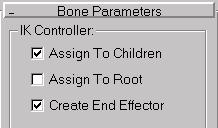
Assign To Children: Assigns the IK Controller to all of the created bones, except the first (root) bone. When clear, the standard PRS Transform controller is assigned to the bones.
Assign To Root: Assigns an IK Controller to the root bone as well as all of its children. When clear, the root bone is assigned a PRS Transform controller. This check box is disabled when Assign to Children is clear.
Create End Effector: Creates an end effector to the last child in the chain of created bones. When clear, the end effector is not assigned.
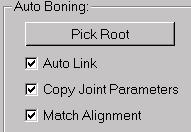
The items in this area let you automatically assign bones to the linked objects in an existing hierarchy. The options in the IK controller area affect these bones in the same way they affect bones you create with the mouse.
Pick Root: Turn on and select an object in the viewports to establish the root object of your chain. Bones will be created for that object, plus all its descendants. The selected object can be the child of another, resulting in boning of a subtree.
Auto Link: Automatically links the corresponding objects in the specified hierarchy to their associate bones. When this is clear, the bones are linked to each other, but the objects are not linked to the bones. In most cases, you will want this turned on.
Copy Joint Parameters: Turn on to copy all of the joint parameters (sliding and rotational joint parameters found in the Hierarchy/IK branch) from the objects in the hierarchy to the bones.
Match Alignment: Matches the local coordinate system of the bones to the local coordinate system of the associate objects in the hierarchy. When clear, the bones are created with local coordinate systems that are aligned with the world axes.
To adjust the parameters for all bones in the chain, you select a single bone, and then adjust the parameters in Motion Panel/Parameters to affect all bones in the hierarchy.

These settings are the same as those in Files/Preferences/Inverse Kinematics. The main difference between these and the original IK settings is that these affect only the master IK controller for the selected chain, whereas the others affect all (original) IK systems in 3DS MAX.
Position: Specifies, in units, the “slop” factor between the end effector and its associate object. This is the allowable distance between the end effector and its object, given the current IK solution.
Rotation: Specifies the allowable number of degrees of rotational error between a rotational end effector and its associate object.
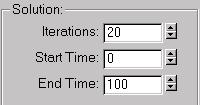
Iterations: Specifies the maximum number of iterations allowed to solve the IK solution. The actual number of iterations used depends on the difficulty of the problem. This value simply puts a cap on it.
Start Time/End Time: Specifies the range of frames in which IK is solved. If the Start Time is set to 20 and the End Time is set to 80 in a 100 frame animation, and then the end effector is animated, the animation of the chain will only be correctly solved within the Start and End range .

When you first create a chain, the initial position of the bones is the initial state. The options here let you display, alter, or lock the initial state. When both of these check boxes are clear (the default), transforming the end effector is different than transforming the other joints in the chain. When you select and transform a joint assigned an end effector, you are actually transforming the end effector, and an IK solution transforms the joints. This will alter the position of the bones in the viewport, but will not alter their initial state. On the other hand, when you select and transform any of the joints without end effectors, you alter their initial state.
Show Initial State: Shuts off the real-time IK solution. All objects in the chain are moved to their initial positions and orientations prior to any changes caused by IK calculations. The positions of the end effectors, however, are not affected. Select this option to view the initial state, or adjust the initial state of bones with end effectors. This is useful when setting joint limits in the Hierarchy/IK branch; the joints jump to their limits while you set them. When this is clear (the default), you can select and alter the initial state of bones without end effectors, but when you select a bone with an end effector, the end effector is transformed, leading to an IK solution; the initial state of the associate object is not changed. By selecting this, you can transform the initial state of the associate object.
Lock Initial State: Locks all bones in the chain from direct transformations. You can, however, transform the end effector of any joint to generate the IK solution without altering the initial state. Activate this when you want to avoid accidentally selecting and transforming joints that are not assigned end effectors. When Show Initial State is selected, Lock Initial State is ignored.
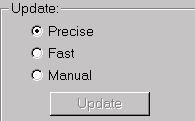
The options in this area determine how the IK calculation is solved during the transformation of the end effector.
Precise: The entire chain is solved precisely for all frames from the Start time to the current time. When you let up on the mouse, the chain will not move. Since all frames must be solved from Start to current, the solution will take longer if the current frame is 1000 rather than 100.
Fast: The chain is solved only for the current frame while the mouse is moved. Releasing the mouse button, solves for all frames. Although this is faster than Precise, sometimes the current-frame solution differs slightly from the all-frame solution. As a result, when you let up on the mouse, the bones in the chain might shift a bit.
Manual: When this option is used, the IK problem is not solved until you click the Update button.
Update: Use this when Manual is turned on, to solve the IK solution.

The options here affect the display of the joint axes and limits. When a Rotational or Sliding joint is Active (Active is selected in the Sliding or Rotational Joints rollouts in the Hierarchy/IK panels), an orange “rod” appears representing the active axis. When the joint is also Limited, a pair of small orange squares appear, representing the From and To limits of the joint. If it’s a Sliding joint, the squares are positioned on the axis rod. If it’s a Rotational joint, the squares are at the ends of an orange arc.
Always: Displays the axis rod and joint limits for all joints in the chain at all times.
When Selected: Displays the axis rod and joint limits only on selected joints.
Tip: The joint icons can be difficult to see when the bones are linked to mesh objects. When animating a bone-based hierarchy, you can hide all of the objects and display and animate only the bones, which makes the joint icons more visible. This is most easily done by hiding Geometry by category in the Display branch.
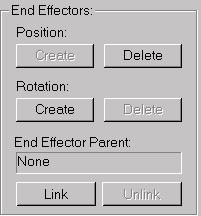
With the options in this area, you can add or delete Position or Rotation end effectors for any joint. Options affect only the currently selected joint. An end effector is the object that the IK chain follows to come to a solution. There are two types of end effectors; Position and Rotation. Both are displayed as three intersecting blue lines at the joint. When you select a joint that carries either or both end effectors, and perform a transformation matching the type of end effector, only the end effector itself is transformed. The objects in the chain then use IK to follow and create the IK solution.
When you transform a joint that does not have an end effector (or perform a type of transform that doesn’t match the assigned end effector) you transform the joint itself and alter its initial state. When you first create a chain of bones, a Position end effector is automatically created on the last joint.
Creates or deletes Position end effectors. If the node already has an end effector, only the Delete button is enabled.
Create: Creates a Position end effector for the selected node.
Delete: Removes the Position end effector from the selected node.
Works like the Position buttons, except Rotation end effectors are created rather than Position end effectors. When you want to solve for IK rotation, add a Rotation end effector, and then use the Rotate tool to rotate the end effector.
Create: Creates a rotational end effector.
Delete: Deletes a rotational end effector.
Links an end effector to another object in the scene. Since end effectors are not, in themselves, objects, you won’t see this linkage in Track View, but the linked end effector will inherit the transformations of its parent.
Note: Apart from the root object, you can’t link an end effector to an object in the hierarchy because it would create an endless loop. The position of all objects in the hierarchy depend on the position of the end effector, so the end effector can’t depend on the position of an object in the hierarchy.
End Effector (Display): Displays the name of the selected parent object.
Link: Makes a selected object a parent of the currently selected link.
Unlink: Unlinks the currently selected end effector from its parent.

Delete: Deletes the selected joint.
Note: Using the Delete key will delete the entire hierarchy.
Position/Rotation: Select Position to see the Key Info parameter rollouts specific for a Position end effector. Select Rotation to see the parameters for an assigned Rotation end effector. The related button is disabled if its end effector is not assigned. (The Key Info parameters are the same as those used for any Position or Rotation controller.)
The Hierarchy/IK command panel treats the IK Controller in the same way as the original IK system, with the following exceptions and changes:
Test the IK Chain.
The end effector (blue cross) follows your motion. The bones follow the end effector.