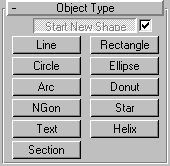


3D Studio MAX Splines include the following object types:

Start New Shape: A shape can contain a single spline or it can be a compound shape containing multiple splines. You control how many splines are in a shape using the Start New Shape controls in the Object Type rollout The check box next to the Start New Shape button determines when new shapes are created. When the box is checked, the program creates a new shape object for every spline you create. When the box is unchecked, splines are added to the current shape until you click the Start New Shape button.
Shape Selection Buttons: Click on these to specify the type of shape you wish to create.
![]()
Many of the spline tools use the Creation Methods rollout.This rollout sets whether you define splines by their center point or by their diagonal.
Center: Your first mouse press defines the center of the shape and you drag out a radius or corner point.
Edge : Your first mouse press defines a point on the side or at a corner of the shape and you drag out a diameter or the diagonal corner.
Text and Star do not have a Creation Methods rollout.
Line and Arc have unique Creation Methods rollouts that are discussed in their respective topics.

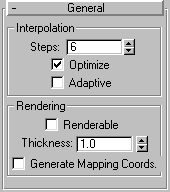
The Interpolation rollout sets how 3DS MAX generates a spline. All spline curves are divided into small straight lines that approximate the true curve. The number divisions between each vertex on the spline are called steps. The more steps used the smoother the curve appears.
Spline steps can be either adaptive or manually specified. The method used is set by the state of the Adaptive check box.
Adaptive: When checked, automatically sets the number of steps for each spline to produce a smooth curve. Straight segments always receive 0 steps.
When unchecked, enables manual interpolation control using Optimize and Steps. You use the Steps field to set the number of divisions 3DS MAX uses between each vertex. The valid range is 0 to 100 steps. Splines with tight curves require many steps to look smooth while gentle curves require fewer steps.
Default=unchecked.
Optimize: When checked, removes unneeded steps from straight segments in the spline. Default=checked.
Note: Optimize is not available when Adaptive is checked.
The main use for manual interpolation is to create splines for morphing or other operations where you must have exact control over the number of vertices created.
Renderable: When checked, the shape is rendered using a 12-sided circle as a cross section. Mapping coordinates are generated with U mapped once around the perimeter, and V mapped once along the length. Note that the thickness is not displayed in the viewports.
Thickness : Set this to specify the diameter of the rendered spline when Renderable is checked in the Properties dialog. (Spinner Value: float, 0.001 to 1.0E30)
Generate Mapping Coords : Check this to apply mapping coordinates. The U coordinate wraps once around the thickness of the spline, while the V coordinate is mapped once along the length of the spline. Tiling is achieved via the tiling parameters in the material itself.

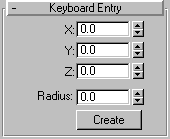
You can create most splines solely using keyboard entry. The process is generally the same for all splines and the parameters are found under the Keyboard Entry rollout. Keyboard entry for each spline varies primarily in the number of optional parameters. The image above shows a sample Keyboard Entry Rollout for the Circle shape.
The keyboard entry rollout contains three fields for the X, Y, and Z coordinates of the initial creation point plus a variable number of parameters used to complete the spline. Enter values in each field and click the Create button to create the spline.
Each spline is added to the compound shape. You can tell you are creating a compound shape because all the splines remain selected.
Issues to remember about creating shapes are: